 Blaine
 Windows Built for Birch Bay's Coastline
Birch Bay sits right on the water, which means the homes here take a different kind of beating than houses a few miles inland in Blaine or Custer. Salt-laden air moves in off the bay almost constantly, wind-driven rain hits west- and north-facing walls at an angle instead of straight down, and the long gray stretch from October through May keeps everything around a window opening damp for weeks at a time. Windows in this environment don't just need to look good — they need to keep water out under sideways rain, resist corrosion from salt air, and hold their seals through repeated wet-dry cycling year after year.
We've replaced and installed windows up and down this stretch of Whatcom County long enough to know which failure patterns show up first in Birch Bay specifically: corroded hardware on older aluminum-frame windows, soft trim and sills where flashing was skipped or done wrong, and fogged double-pane glass from seals that gave out earlier than they should have. A correct window job here accounts for all of that from the start, not as an afterthought.
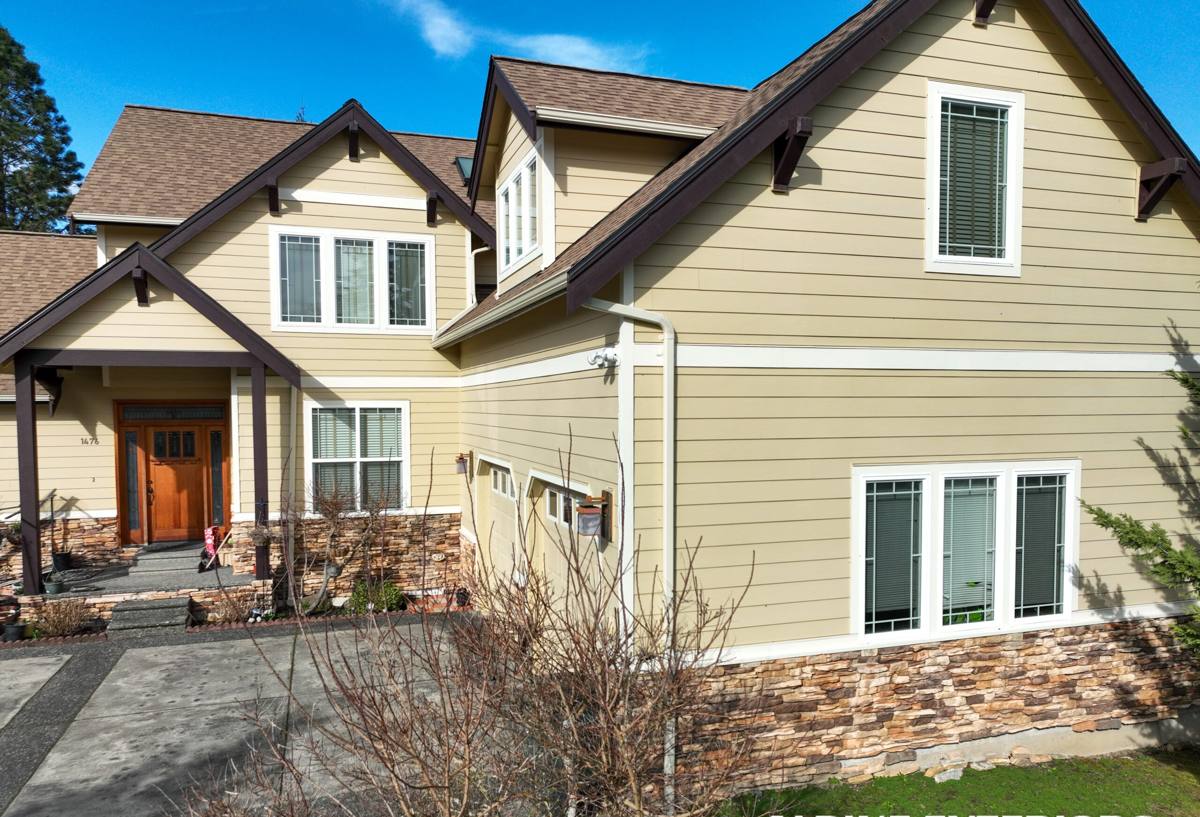
What the Salt Air and Rain Actually Do to a Window
Salt Air and Hardware
Salt in the air settles on everything, including window hardware, tracks, and exposed fasteners. Over years, that accelerates corrosion on lower-grade hardware and can pit or seize locks, cranks, and rollers well before the glass or frame shows any wear. It's one of the most common "the window still looks fine but won't open right" complaints we hear from Birch Bay homeowners.
Wind-Driven Rain
Rain that comes in at an angle behaves differently than rain falling straight down — it gets pushed under trim, into gaps around the frame, and behind siding if the flashing and sealant weren't done correctly the first time. This is almost always a bigger factor in window failures here than the glass itself. Most leaks we find trace back to installation and flashing details, not the window unit.
The Long Moss Season
Whatcom County's wet season runs long, and anywhere moisture sits — window sills, the tops of trim boards, low spots in cladding — moss and algae get a foothold. Beyond looking bad, that growth holds moisture against wood trim and paint, which shortens the life of both. Window details that shed water cleanly instead of letting it pool are a real defense against this, not just a cosmetic choice.
Signs a Birch Bay Home Needs Window Attention
- Visible condensation or fogging between the panes of a double-pane window (a sign the seal has failed)
- Soft, discolored, or spongy trim and sill wood around the window opening
- Windows that stick, won't latch fully, or have corroded cranks and hardware
- Drafts or a noticeable temperature difference near the window even when it's closed
- Moss, algae, or dark streaking building up on the sill or the trim below the window
- Paint that's peeling or bubbling specifically around the window frame, not the rest of the wall
- Noticeably higher heating bills without another clear explanation
Any one of these on its own isn't necessarily an emergency, but a few showing up together, especially on a wall that faces the bay, usually means water is getting past the seal or flashing.
What a Correct Window Installation Involves
Replacing a window is not just pulling out an old unit and dropping in a new one. On a coastal property like this, the installation details matter more than the window brand.
Flashing and Weather Barrier First
Before a new window ever goes in, the opening needs proper flashing tape and integration with the home's weather-resistant barrier, so any water that does get past the exterior surface is directed back out, not into the wall cavity. This step gets skipped more often than homeowners realize, and it's the single biggest reason windows leak years down the road.
Sill Pan and Sloped Sills
A sill pan under the window, combined with a sill that slopes slightly outward, gives water a clear path out instead of a place to sit. In a wind-driven-rain environment, this detail is not optional — it's the difference between a window that sheds water for decades and one that starts rotting the framing underneath within a few years.
Sealant and Fastening
Sealant needs to be applied at the right points — not everywhere, since sealing the wrong spots can actually trap water inside the wall instead of letting it drain. Fasteners should be corrosion-resistant given the salt air, and the frame needs to be shimmed level and square so the sashes seal properly for the life of the window.
Interior and Exterior Trim
Trim gets reinstalled or replaced with attention to the same moisture path — caulked and painted correctly so water doesn't wick into end grain, which is usually where trim rot starts first.
Choosing Materials That Hold Up Here
There's no single "best" window material for every situation — it depends on the home, the budget, and how exposed that particular wall is to salt air and rain. What we won't do is install a product or configuration we know performs poorly in this specific climate just because it's cheaper up front — we'd rather explain the trade-off honestly.
| Frame Material | How It Handles Salt Air & Moisture | Maintenance | Typical Lifespan Here |
|---|---|---|---|
| Vinyl | Doesn't corrode; performs well near the coast | Low — occasional cleaning | 20–30 years |
| Fiberglass | Very stable in wet, salty conditions; low expansion/contraction | Low | 30+ years |
| Wood (clad exterior) | Good if cladding and flashing are done right; bare wood exposed to salt air needs more upkeep | Moderate to high on exposed sides | 20–30 years with upkeep |
| Aluminum (older/uninsulated) | Prone to corrosion and condensation near the bay over time | Higher — hardware and finish wear faster | Varies widely; often the first to show problems |
Glass packages matter too. For a home exposed to bay winds, we generally recommend dual- or triple-pane units with a warm-edge spacer system, since spacer quality has a lot to do with how long a seal lasts in a marine climate. Low-E coatings help with energy performance year-round, which matters given how many gray, heating-heavy months Whatcom County sees.
Our Process for a Birch Bay Window Job
1. On-Site Assessment
We look at each window opening individually — sun and wind exposure, condition of the existing flashing and sheathing, and any signs of past water intrusion. Two windows on the same house can need different approaches depending on which way they face.
2. Honest Scope and Options
We'll tell you plainly if an opening needs sheathing or framing repair beyond just a new window unit — better to know that before installation than discover rot mid-job. You get real options at different price points, with the trade-offs of each explained.
3. Installation
Proper flashing, sill pan, sealant, and fastening as described above, done to the same standard whether it's one window or a whole-house replacement.
4. Final Check
We check operation, seal, and finish on every window before we consider the job done — sashes should open, close, and latch smoothly, with no gaps or rattling.
Why Local Experience in Birch Bay Matters
A contractor who mostly works dry, inland properties can do fine work in general and still miss the details that matter specifically here. Knowing that a north-facing wall on the bay side takes wind-driven rain most winters, or that certain hardware corrodes faster this close to salt water, comes from having done this work in this exact area — not from a general installation manual. We work throughout Blaine and Whatcom County, and Birch Bay's exposure to the water is something we plan for specifically, not something we treat the same as every other job.
Cost Factors to Expect
Every home and every opening is different, so we won't quote a number without seeing the job, but a few things consistently move the price up or down:
| Factor | Effect on Cost |
|---|---|
| Number of windows replaced at once | Bundling multiple windows typically lowers the per-window cost |
| Frame material chosen | Vinyl is usually the most affordable; fiberglass and clad wood cost more upfront |
| Condition of existing framing/sheathing | Rot repair adds cost but is far cheaper to fix now than after a new window fails |
| Custom sizes or shapes | Non-standard openings cost more than stock sizes |
| Glass package (Low-E, triple-pane, etc.) | Higher-performance glass adds cost but pays back in comfort and energy savings |
| Wall exposure | Bay-facing walls sometimes need extra flashing or drainage detail, adding modest cost |
Maintaining New Windows in a Coastal Climate
Even a well-installed window benefits from a little seasonal attention in this environment. Rinsing salt residue off frames and glass a couple times a year, keeping sills clear of debris and moss buildup, and checking that weep holes (the small drainage openings on the bottom of the frame) aren't clogged all go a long way toward getting the full lifespan out of the investment. If cranks or locks start feeling stiff, a light lubrication before they seize up is cheaper than replacing corroded hardware later.
If you're noticing drafts, fogged glass, sticking sashes, or trim damage around your windows, or you're planning ahead for a full replacement, we're happy to take a look and give you a straightforward, no-pressure estimate — no obligation, just an honest read on what your home actually needs. The form below is the easiest way to get started.